05. 编辑 Chirps
让我们添加一个其他流行的以鸟类为主题的微博平台中缺少的功能——编辑 Chirps 的功能!
路由
首先,我们将更新我们的路由文件以启用 chirps.edit 和 chirps.update 路由,用于我们的资源控制器。chirps.edit 路由将显示用于编辑 Chirp 的表单,而 chirps.update 路由将接受来自表单的数据并更新模型。
<?php
use App\Http\Controllers\ChirpController; use App\Http\Controllers\ProfileController; use Illuminate\Support\Facades\Route; Route::get('/', function () { return view('welcome'); }); Route::get('/dashboard', function () { return view('dashboard'); })->middleware(['auth', 'verified'])->name('dashboard'); Route::middleware('auth')->group(function () { Route::get('/profile', [ProfileController::class, 'edit'])->name('profile.edit'); Route::patch('/profile', [ProfileController::class, 'update'])->name('profile.update'); Route::delete('/profile', [ProfileController::class, 'destroy'])->name('profile.destroy'); }); Route::resource('chirps', ChirpController::class)- ->only(['index', 'store'])+ ->only(['index', 'store', 'edit', 'update']) ->middleware(['auth', 'verified']);
require __DIR__.'/auth.php'; 此控制器的路由表现在如下所示
| 动词 | URI | 操作 | 路由名称 |
|---|---|---|---|
| GET | /chirps |
index | chirps.index |
| POST | /chirps |
store | chirps.store |
| GET | /chirps/{chirp}/edit |
edit | chirps.edit |
| PUT/PATCH | /chirps/{chirp} |
update | chirps.update |
链接到编辑页面
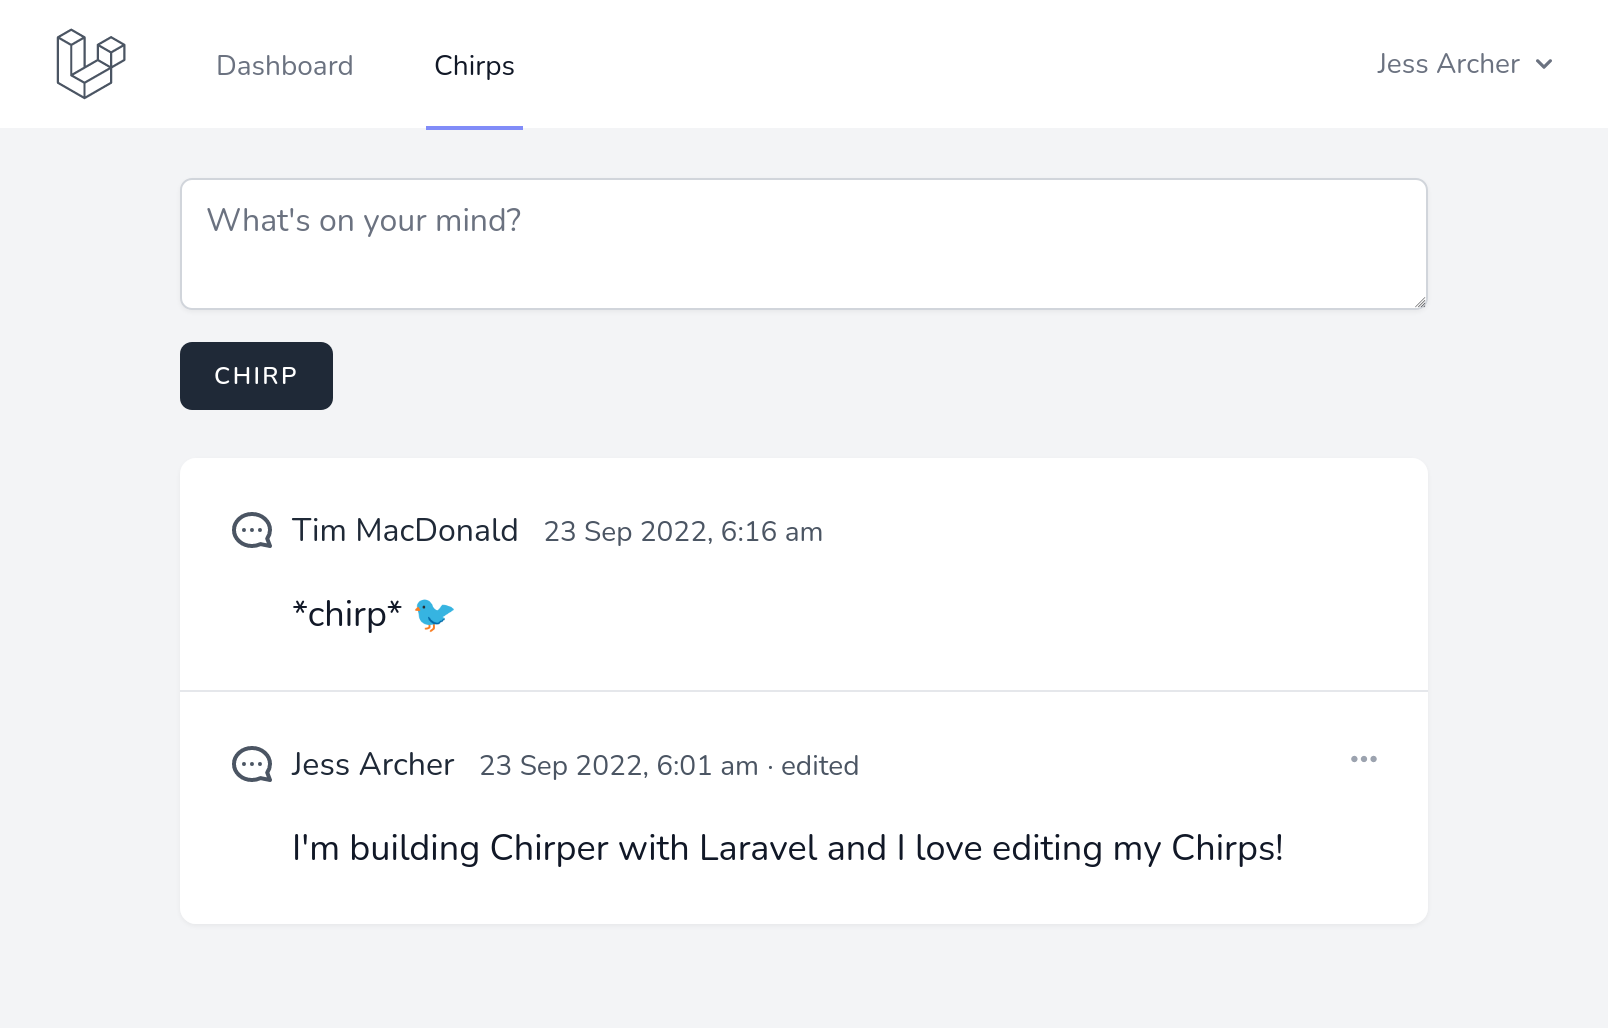
接下来,让我们链接新的 chirps.edit 路由。我们将使用 Breeze 附带的 x-dropdown 组件,该组件仅显示给 Chirp 作者。我们还将通过比较 Chirp 的 created_at 日期与其 updated_at 日期来显示 Chirp 是否已被编辑的指示。
<x-app-layout> <div class="max-w-2xl mx-auto p-4 sm:p-6 lg:p-8"> <form method="POST" action="{{ route('chirps.store') }}"> @csrf <textarea name="message" placeholder="{{ __('What\'s on your mind?') }}" class="block w-full border-gray-300 focus:border-indigo-300 focus:ring focus:ring-indigo-200 focus:ring-opacity-50 rounded-md shadow-sm" >{{ old('message') }}</textarea> <x-input-error :messages="$errors->get('message')" class="mt-2" /> <x-primary-button class="mt-4">{{ __('Chirp') }}</x-primary-button> </form> <div class="mt-6 bg-white shadow-sm rounded-lg divide-y"> @foreach ($chirps as $chirp) <div class="p-6 flex space-x-2"> <svg xmlns="http://www.w3.org/2000/svg" class="h-6 w-6 text-gray-600 -scale-x-100" fill="none" viewBox="0 0 24 24" stroke="currentColor" stroke-width="2"> <path stroke-linecap="round" stroke-linejoin="round" d="M8 12h.01M12 12h.01M16 12h.01M21 12c0 4.418-4.03 8-9 8a9.863 9.863 0 01-4.255-.949L3 20l1.395-3.72C3.512 15.042 3 13.574 3 12c0-4.418 4.03-8 9-8s9 3.582 9 8z" /> </svg> <div class="flex-1"> <div class="flex justify-between items-center"> <div> <span class="text-gray-800">{{ $chirp->user->name }}</span> <small class="ml-2 text-sm text-gray-600">{{ $chirp->created_at->format('j M Y, g:i a') }}</small>+ @unless ($chirp->created_at->eq($chirp->updated_at))+ <small class="text-sm text-gray-600"> · {{ __('edited') }}</small>+ @endunless </div>+ @if ($chirp->user->is(auth()->user()))+ <x-dropdown>+ <x-slot name="trigger">+ <button>+ <svg xmlns="http://www.w3.org/2000/svg" class="h-4 w-4 text-gray-400" viewBox="0 0 20 20" fill="currentColor">+ <path d="M6 10a2 2 0 11-4 0 2 2 0 014 0zM12 10a2 2 0 11-4 0 2 2 0 014 0zM16 12a2 2 0 100-4 2 2 0 000 4z" />+ </svg>+ </button>+ </x-slot>+ <x-slot name="content">+ <x-dropdown-link :href="route('chirps.edit', $chirp)">+ {{ __('Edit') }}+ </x-dropdown-link>+ </x-slot>+ </x-dropdown>+ @endif </div> <p class="mt-4 text-lg text-gray-900">{{ $chirp->message }}</p> </div> </div> @endforeach </div> </div> </x-app-layout>创建编辑表单
让我们创建一个新的 Blade 视图,其中包含一个用于编辑 Chirp 的表单。这与创建 Chirp 的表单类似,只是我们将发布到 chirps.update 路由,并使用 @method 指令指定我们正在进行“PATCH”请求。我们还将使用现有的 Chirp 消息预填充字段。
<x-app-layout> <div class="max-w-2xl mx-auto p-4 sm:p-6 lg:p-8"> <form method="POST" action="{{ route('chirps.update', $chirp) }}"> @csrf @method('patch') <textarea name="message" class="block w-full border-gray-300 focus:border-indigo-300 focus:ring focus:ring-indigo-200 focus:ring-opacity-50 rounded-md shadow-sm" >{{ old('message', $chirp->message) }}</textarea> <x-input-error :messages="$errors->get('message')" class="mt-2" /> <div class="mt-4 space-x-2"> <x-primary-button>{{ __('Save') }}</x-primary-button> <a href="{{ route('chirps.index') }}">{{ __('Cancel') }}</a> </div> </form> </div></x-app-layout>更新我们的控制器
让我们更新 ChirpController 上的 edit 方法以显示我们的表单。Laravel 将使用 路由模型绑定 自动从数据库加载 Chirp 模型,以便我们可以直接将其传递给视图。
然后,我们将更新 update 方法以验证请求并更新数据库。
即使我们只向 Chirp 的作者显示编辑按钮,我们仍然需要确保访问这些路由的用户已获得授权。
<?php
namespace App\Http\Controllers; use App\Models\Chirp; use Illuminate\Http\RedirectResponse; use Illuminate\Http\Request; use Illuminate\Http\Response;+use Illuminate\Support\Facades\Gate; use Illuminate\View\View; class ChirpController extends Controller {
/** * Display a listing of the resource. */ public function index(): View { return view('chirps.index', [ 'chirps' => Chirp::with('user')->latest()->get(), ]); } /** * Show the form for creating a new resource. */ public function create() { // } /** * Store a newly created resource in storage. */ public function store(Request $request): RedirectResponse { $validated = $request->validate([ 'message' => 'required|string|max:255', ]); $request->user()->chirps()->create($validated); return redirect(route('chirps.index')); } /** * Display the specified resource. */ public function show(Chirp $chirp) { // } /** * Show the form for editing the specified resource. */- public function edit(Chirp $chirp)+ public function edit(Chirp $chirp): View {- //+ Gate::authorize('update', $chirp);+ + return view('chirps.edit', [+ 'chirp' => $chirp,+ ]); } /** * Update the specified resource in storage. */- public function update(Request $request, Chirp $chirp)+ public function update(Request $request, Chirp $chirp): RedirectResponse {- //+ Gate::authorize('update', $chirp);+ + $validated = $request->validate([+ 'message' => 'required|string|max:255',+ ]);+ + $chirp->update($validated);+ + return redirect(route('chirps.index')); }
/** * Remove the specified resource from storage. */ public function destroy(Chirp $chirp) { // } }
您可能已经注意到验证规则与 store 方法重复。您可以考虑使用 Laravel 的 表单请求验证 来提取它们,这使得重用验证规则和保持控制器轻量级变得容易。
授权
默认情况下,authorize 方法将阻止所有人更新 Chirp。我们可以通过使用以下命令创建一个 模型策略 来指定谁被允许更新它。
php artisan make:policy ChirpPolicy --model=Chirp这将在 app/Policies/ChirpPolicy.php 中创建一个策略类,我们可以更新它以指定只有作者被授权更新 Chirp。
<?php
namespace App\Policies; use App\Models\Chirp; use App\Models\User; use Illuminate\Auth\Access\HandlesAuthorization; class ChirpPolicy {
use HandlesAuthorization; /** * Determine whether the user can view any models. */ public function viewAny(User $user): bool { // } /** * Determine whether the user can view the model. */ public function view(User $user, Chirp $chirp): bool { // } /** * Determine whether the user can create models. */ public function create(User $user): bool { // } /** * Determine whether the user can update the model. */ public function update(User $user, Chirp $chirp): bool {- //+ return $chirp->user()->is($user); }
/** * Determine whether the user can delete the model. */ public function delete(User $user, Chirp $chirp): bool { // } /** * Determine whether the user can restore the model. */ public function restore(User $user, Chirp $chirp): bool { // } /** * Determine whether the user can permanently delete the model. */ public function forceDelete(User $user, Chirp $chirp): bool { // } }测试一下
现在来测试一下!使用下拉菜单编辑几个Chirps。如果你注册了另一个用户帐户,你会发现只有Chirp的作者才能编辑它。

